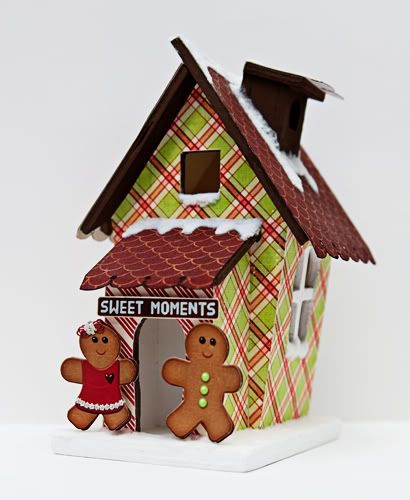
First, I painted the edges of the roof and windows and door, and the chimney. I knew that the paper I was using would be brown, so I took some brown paint and added some black to it, to darken it up a bit. Not a perfect match, but I'm a "close enough" kinda girl when it comes to that. I figure everyone will be looking at the rest of the adorableness of the house, not the edges of the roof. :)I also painted the base, the window panes, and the inside of that main doorway white. I knew I would be adding some "snow", so I wanted a white base, and I like white window panes.
Next up, was measuring the largest dimensions of the various sides of the house and roof. While there are several sides that aren't square (and a square is rarely a perfect square), the easiest way I've found for covering altered wood pieces is to take the largest dimensions to the next closest increment. So instead of something being 2 1/16" x 3 5/8", I make it 2 1/8" x 3 3/4" so that I have a little wiggle room all around. I use a pencil and write the dimension directly on the wood so that I know what piece goes where.
Then I open up photoshop and start playing! I added extra lengths to the roof pieces because I knew I wanted to use a decorative edge punch to make them special. Other than that, I use my slightly larger dimensions that I've written on the wood piece. I like to open up new documents for each piece, even if multiple sides are the same (like the front and back on this one, or the 2 sides). If I resize a paper to make the pattern fit better, then I drag the resized paper from one document to the next to make sure that all the patterns all the same. For the gingerbread house I resized the plaid and dragged it onto 6 different documents.
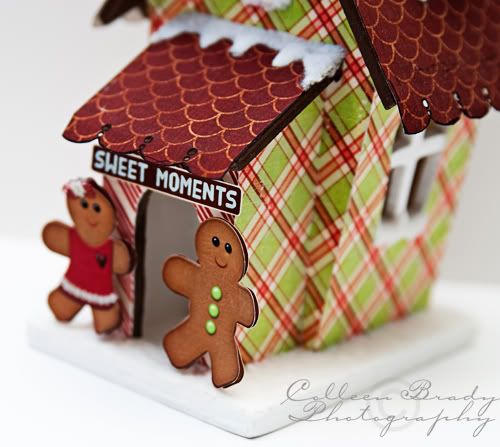
Once I have all the papers set, I flatten the documents and open 1 or 2 new documents at 8.5"x11" for printing. I try and fit as many pieces onto a single 8.5"x11" sheet as I can, to maximize my paper stash. I rotate pieces as needed to make them fit. If I am also printing elements (such as the gingerbread people and the little sign on the front) I resize them to make them somewhat proportional to the project. For this project, I sized them in the document of the striped paper to see how big they would be. I guessed on the doorway size, but I did ok cuz they can actually fit through!
Once I've squeezed all I can out of a sheet of paper, I print the whole project out. Sometimes I'll wait to do another project to add to the sheet to save space and avoid waste. Once everything is printed I let it dry for a little bit. Generally this is unnecessary, but I still like to give the paper time to dry to ensure no smudges. Then I take my time and cut everything out. I usually cut out big chunks, and then trim things nice and neat.
Now comes to fun part. Since nothing is actually square, and since everything was printed slightly larger to allow some wiggle room, all the pieces will need to be trimmed to fit. The sides of this house were mostly rectangles, so I held 1 end of the paper up tight against where it met the roof, and then I traced the outline for the edge of the side with a pencil on the back of the paper. I trimmed and tweaked as needed (I rarely cut straight, so most times I end up need to shave little bits of paper here and there, lol), and then I put it back in place up against the roof, and folded the bottom down until the fold was right at the base. I used a small scraper tool to get it tight up against the base, and then folded it over and creased it with a bone folder. I left the window covered, and came back to that later.
For the front and back with the strange shape, it was a slightly different process. First, I held the paper flush with the base. Then I pressed it as close to the back as I could and traced the diagonal lines for the sides onto the back of the paper. I trimmed that down, and then I used the folding technique to get the top side edges just right. I use one of those processes for all the pieces I have, and I do all of them together so that it gets over and done with, lol. It's a process for sure, but it's the fastest process I've tried.
Once all the cutting and trimming is done, it's time to glue! I use a paint brush and mod podge for my altered wood projects. A thin-ish layer of mod podge, then just stick the piece on and hold it in place. I like to use an old bone folder to get in the cracks and smooth things out nicely (just don't push too hard or you'll scrape and smudge the paper). Normally, that's it! You're done! Do a dance! But for this project, I wanted to add some soft looking snow to the house. I had some white glitter, but then I discovered that Martha Stewart has flocking powder available (I got mine at Michael's). So I snagged a bottle of that and went to town.
First, I laid down a thick layer of glossy accents on the base of the house, and then I generously shook on the flocking powder. Some chunks came out, but that worked out fine as they looked more like real snow. I did a layer everywhere and then stopped for the night for the glossy accents to dry. The next morning, I checked it out and the glossy accents had turned yellow! :( It dries clear on everything else, but naturally, not this project. So I then did 2-3 more layers using watered down mod podge. I added some mod podge to a section of a painters tray, and then lightly brushed it over top the existing flocking powder. You can still see some yellow in spots, but not nearly as bad now.
And that, was that. It took several days to complete with the flocking powder issues, but just the house only took me an afternoon! Such a great project, I really can't wait to make something else. I'll definitely be making another Christmas house next year. I'm thinking I can make a whole little village!
Have a good one!
~Col


